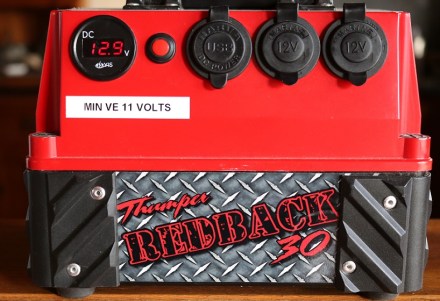
My CW or Wireless Telegraphy renaissance
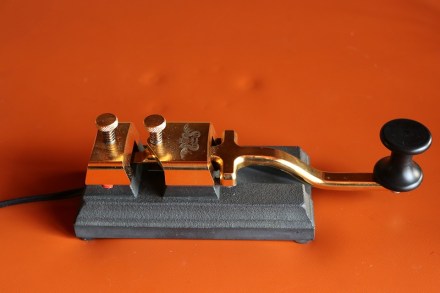
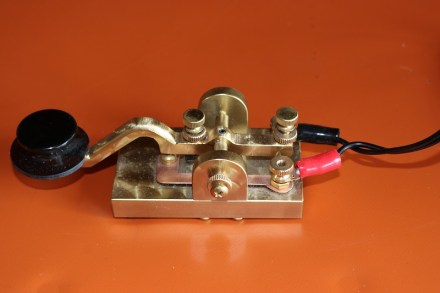
Here are my two morse keys. The key immediately below is the Begali Blade. This is now my shack key, replacing my K4VIZ Camel Back. I purchased my key from from RF Solutions in VK4. Initially, I needed to consciously have a maximum speed in my head as the key encouraged me to race. It is smooth and very quiet. It is a work of art and beautifully made and is great to use.
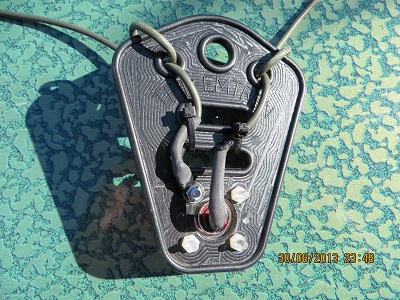
The Camel Back (below) was purchased from Tom, K4VIZ, soon after I obtained the VK5PF call-sign and was my shack key until I decided it would go into my portable gear for use in the field. Buying from Tom was a great experience. He is so proud and protective of his keys. The business is now known as VIZKEYS, following Tom’s decision to sell and retire. Tom would be delighted to know the key has been, and will continue to be used, and not just be a display piece. I am hoping I can activate some parks again as the weather improves. It is an excellent key: easy to use and smooth. It does rattle a little which I do not find intrusive, and although small, it is heavy enough to stay in place on the desk.
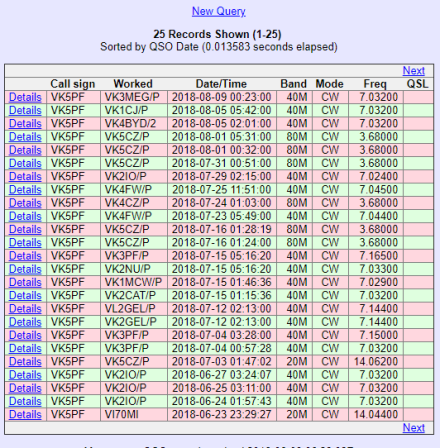
The photo, below, of my most recent page in Log Book of the World (LOTW) for VK5PF, shows some Australian portable stations I have had contacts with using morse code. So far none of these contacts have been confirmed on LOTW. Some of the stations indicate that they use LOTW so I expect some will be confirmed in due course.
The photo below of my most recent LOTW page for VK5BJE, shows no CW contacts, but SSB and FT8 contacts with mainly DX (overseas) stations. My ambition is to work some North American stations while portable and using CW.
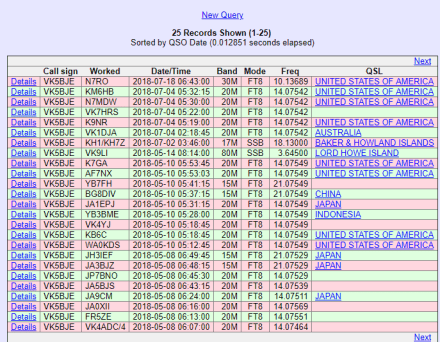
Note Baker and Howland Islands on 17 metres ssb! Getting that station in the log took time and perseverance. I used 100 watts and an Off-centre fed dipole. I was delighted to get that entity helping me get closer to a DXCC via Log Book of the World.
Why Morse Code using a hand key?
When I obtained my advanced call in 1977, sending and receiving morse code in plain language, at ten words a minute, was part of the licence requirements. Like many new amateurs I learned the code, but did not learn any of the techniques for establishing a contact. And voice over the air was magic! I did have a few contacts from time to time but was never really serious. Morse code became more attractive in the late seventies when novice stations came on the air following examination in sending and receiving plain language morse code at five words per minute. Since learning the code the old-fashioned way in the 1970s, my understanding of teaching and learning has progressed. It is instructive to look at two publications and examine the content of each. Remember there were no computers in the 1970s, or at least not in the average home. The latest technology for a learner of morse code was a cassette recorder and morse code tapes from the Wireless Institute of Australia (WIA), or listening to morse code practice sessions on the amateur bands or real contacts, or commercial morse code traffic, also on air. I listened to the tapes so many times I could almost remember them by heart, or in learning language ‘journalise’ them.
The two publications are as follows:
American Radio Relay League, 1970, Learning the Radio Telegraph Code, ARRL, Connecticut, USA. (Thirteenth Edition)
and
Cooke, Roger, G3LDI, 2013, Morse Code for Radio Amateurs 11th Edition, Radio Society of Great Britain, Bedford, England.
These two little books are both excellent. And it is likely that an up-to-date ARRL publication would be similar to the RSGB book. I looked at these two books through the lens of adult learning. Have approaches to learning morse code since the 1970’s changed as we know more about learning and particularly how adults learn? I purchased my ARRL book at the time I enrolled in the WIA course for the AOCP and it is dated by me as the 10th December 1974. The ARRL book chapters are headed, Learning the Code, Learning to Send, High Speed Operation, Operating on the Air, Code practice and Class Instruction. There are just eight pages devoted to Learning the Code. The RSGB book devotes 22 pages to learning the code. The big difference for me are the resources now available to learn the code, especially using household computers. Cooke provides detailed outlines of many computer resources and how to use them.
My aim was not to learn the code. I already know the code. But I wanted to change my approach to improving my skills and do not want to write anything down (letter by letter) at the time of copying a message. I want to use my head! In other words I want to be able to write down in my log, at minimum, the other operator’s call-sign and signal report and provide my name, signal report and call-sign to her/him. I wanted to up-skill in the same way as one might approach learning music or a new language. To assist me meet this goal I chose a program by IZ2UUF, Davide, which provides plenty of resources to assist me meet my goals. I use the Koch method of copying in my head letters, numbers and punctuation, at 20 words per minute. The program runs on Android devices and I have a small tablet. The first two letters are K and M. When you know these at at least 95% accuracy you add in another letter. In learning theory terms I am aiming for deep learning rather than surface learning. Surface learning is most commonly understood to be similar to cramming for an exam. When you walk out of the exam room most of the learning goes. I have heard so many amateurs say that or something similar to me when discussing morse code and their trauma at trying to master it!
Deep learning changes the person. Deep learning is often over-learning. What you learn becomes second nature to you, for example, riding a bicycle or driving a car. I was always impressed by morse code operators who could converse with a key and speak to someone at the same time. I recommend ten minutes a day for IZ2UUF’s program increasing to about half an hour when you are advancing. I set each learning practice run to five minutes, so for half an hour there are six repeats or variations, making up the session. The new letters and punctuation are introduced to the learner based on the apparent difficulty of the letter.
Conversational morse code on the air by me is still some way off. My contacts tend to be to a formula: mainly for SOTA and Parks. However, an intermediate step will be to provide some more details of station equipment, antenna and so on to the other operator.
A similar program is available for Apple devices. It is called Ham Morse and includes the Koch method as well. I recommend it.
I have not searched for a Koch program for a PC but I will be surprised if there is not one available.
Is it worth the effort to learn or revise a legacy mode? After all it is no longer required for amateurs and the military although it is used for identification of aircraft beacons. Well, I have had contacts on 40 metres, for example, where I could not copy the station on ssb but had a comfortable contact using morse code on the same frequency and just after attempting the voice contact. It is also a challenge and, for me, part of life-long learning, something I have engaged in all of my life. I also believe that for me it is part of being a ‘complete’ radio amateur. Being over 21 years of age I hope the exercise for the brain has other benefits as well! What are they again?
I know that practice, practice and more practice is the best way, especially if the practice is spaced and regular. Half an hour on Sunday afternoons is not as good as five minutes per day! Active learning also helps. While I don’t write down what I copy, I hear it in my head. Try not to be passive. Take note of what you are hearing. Rehearse in your head any characters you are having difficulty with. I would welcome the views of more expert and proficient operators. I will admit I miss occasional words, especially as the beginning of a contact. I suppose it is a failure to really ‘tune-in’ before starting. Preparation and anticipation help me mitigate against a slow start.